LinguaMiner
How to use LinguaMiner
A walkthrough of everything the app does, in the order you’ll meet it. Each section has a clip, so you can skim the pictures and only read what you need.
Prefer video? The same tour, narrated, in three minutes: youtu.be/_Iu7WcnNXAo
Haven’t installed it yet? Start with the step-by-step install guide, then come back.
- 1. Getting a video in
- 2. Getting subtitles
- 3. Reading the colours
- 4. Making a card
- 5. Reading books and articles
- 6. Jumping around with the transcript
- 7. The words panel and your level
- 8. Condensed audio
- 9. Bringing in words you already know
- 10. Settings worth knowing
- 11. Keyboard shortcuts
1. Getting a video in
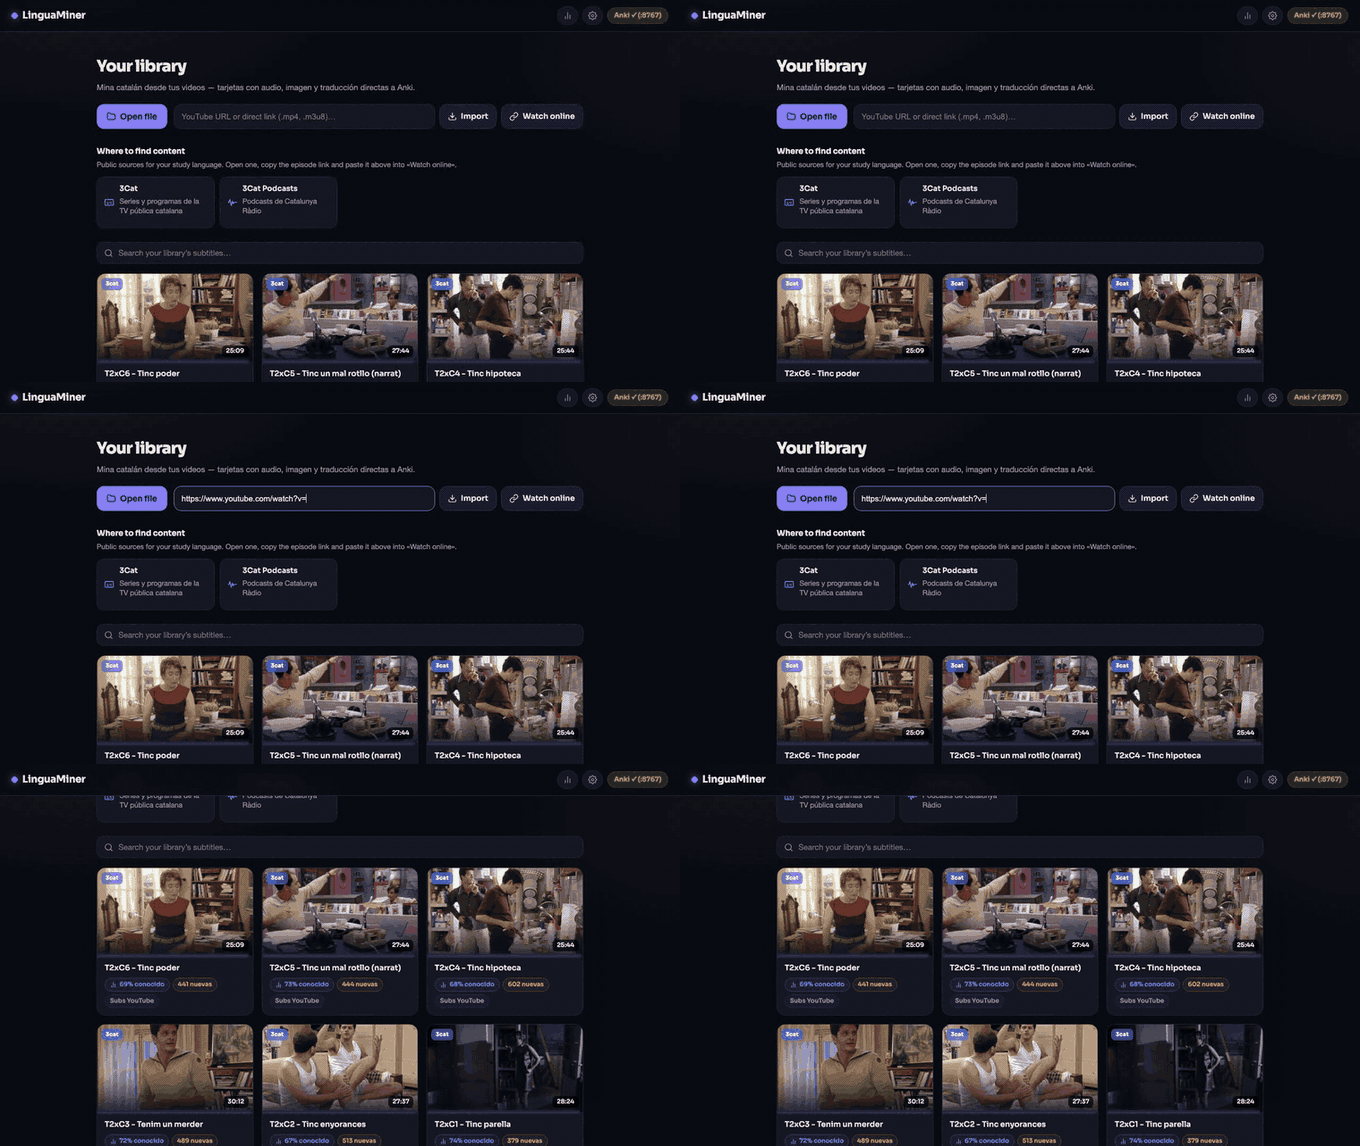
Three ways, all from the front page:
Open file takes an mp4, mkv, mp3 or a subtitle file from your disk.
Watch online takes a YouTube link, a direct .mp4, or an HLS .m3u8
stream. Nothing is downloaded — it plays straight from the source and the
cards cut the audio and the frame out of the stream. This is the fastest way
to try the app.
Import downloads the video first, with a progress bar. Use it when you want offline HD, or when the stream is flaky.
Under those buttons there’s a Where to find content section listing public broadcasters for whatever language you’re studying — Catalan gets 3Cat, Portuguese gets RTP, Italian gets RaiPlay. Open one, copy an episode link, paste it into Watch online.
Podcasts and radio work too. Audio-only sources become normal sessions; you just get no video frame on the card.
2. Getting subtitles
If the video already has subtitles, LinguaMiner uses them and you can start
mining immediately. The card on the library page tells you where they came
from — YouTube subs, YouTube auto-captions, your own .srt, or nothing yet.
If there are none, or the ones you got are rubbish, hit Transcribe.
- Pick small for a quick test. It’s noticeably worse but finishes fast.
- large-v3 is the good one. Catalan additionally gets a fine-tuned model.
- The first run downloads the model (~3 GB). After that it’s local.
Transcribing replaces whatever subtitles were there. That’s deliberate — if the auto-captions are useless, you don’t have to delete the video and start over. Your word statuses are stored per word, not per subtitle file, so re-transcribing never costs you vocabulary you’d already marked.
It looks stuck. On a 50-minute episode, several minutes pass before the percentage moves — that’s the model loading and the voice detection pass. Press Transcribe once and let it work. Pressing it repeatedly used to start extra jobs that fought each other for the CPU; the app now refuses, but patience is still the right move.
You can also attach your own .srt at any time with the paperclip button,
which is what you want when you find a better subtitle file than the site ships.
3. Reading the colours
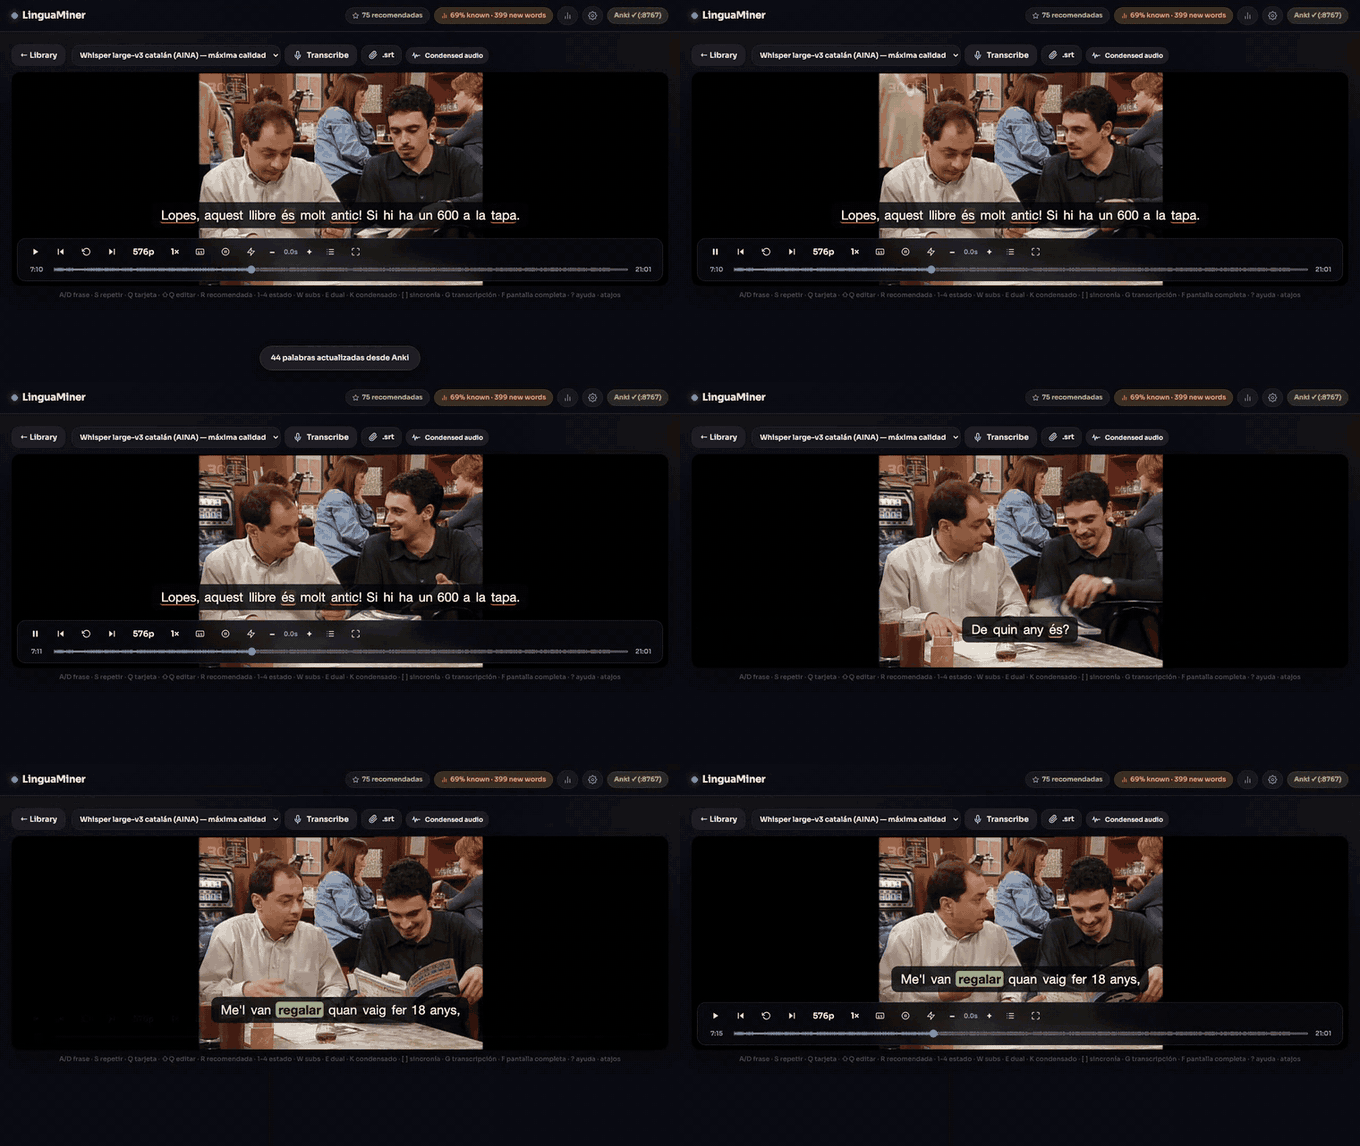
Every word in the subtitle is coloured by what you know:
| Look | Meaning |
|---|---|
| red underline | new — you’ve never marked this word |
| orange underline | learning — it’s in Anki but not mature yet |
| no mark | known |
| grey | ignored — you told the app to stop asking |
| filled block | recommended: mine this one |
The filled block is the part worth understanding. A word gets highlighted only when three things are true at once: you don’t know it, it’s frequent enough to be worth your time, and it’s not a proper noun.
That last rule matters more than it sounds. Frequency data will happily tell you that a character’s name is one of the most common words in the show — true, and useless. The version of this feature that only checked “one unknown word in the sentence” spent its time recommending names.
How frequent counts as frequent enough follows your own level. Set it under ⚙️ → Recommended words, from Very frequent (only the highest-value words) down to All but names. Start strict and loosen it as your vocabulary grows.
The header chip shows what percentage of the whole video you already know, plus how many new words are left.
4. Making a card
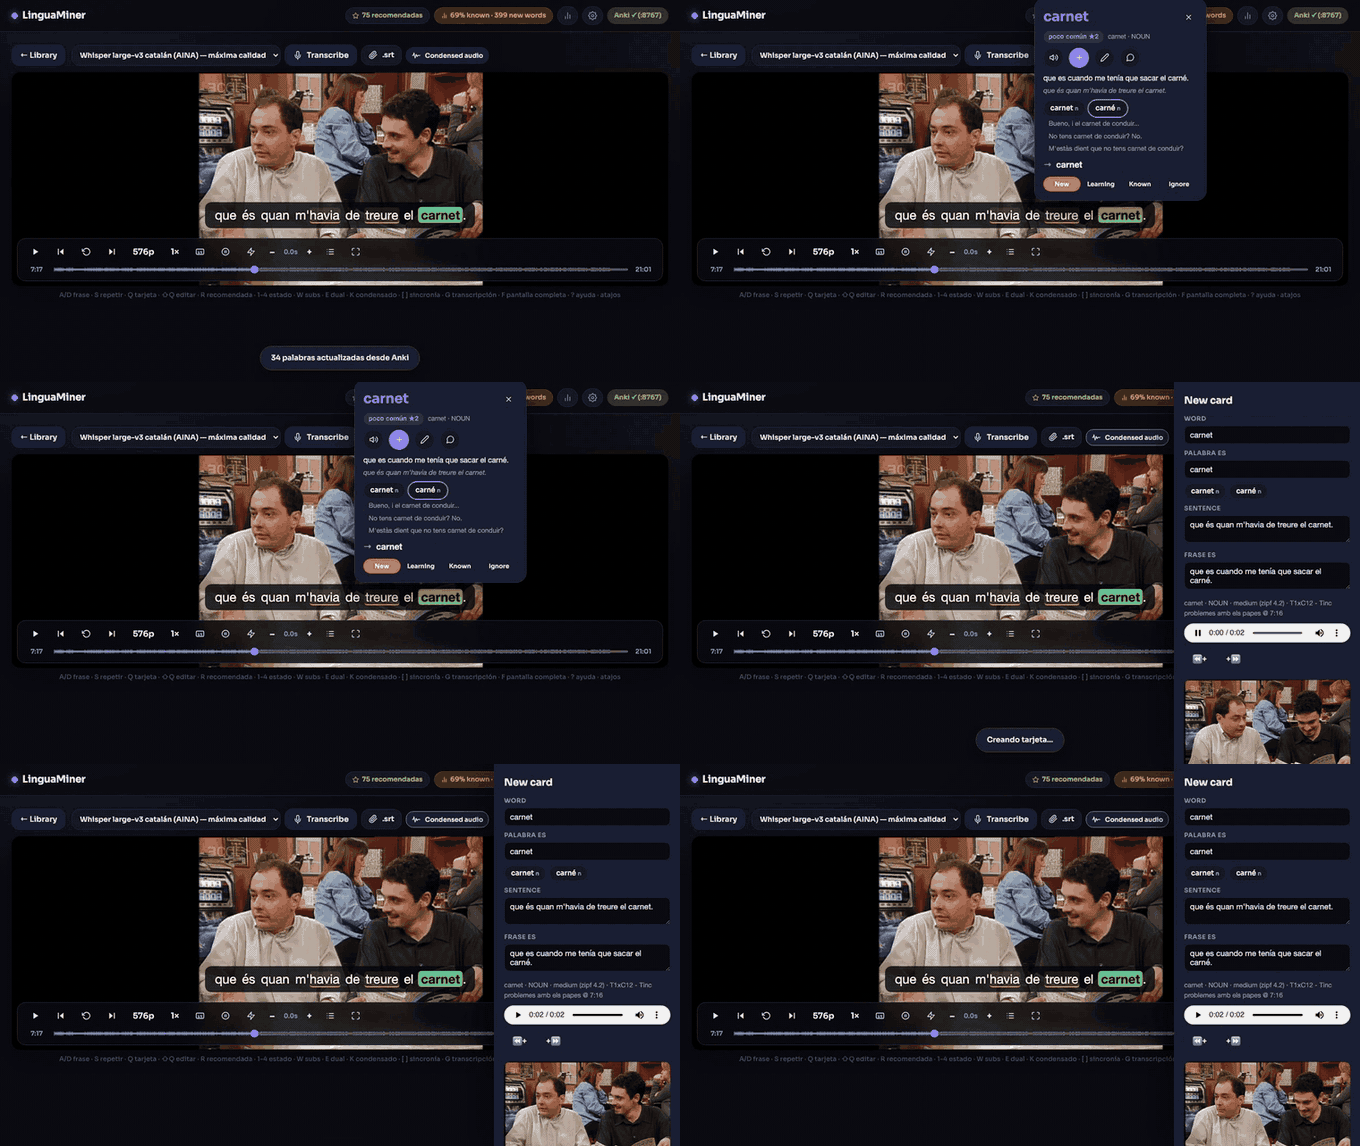
Click any word. You get a popup with the dictionary entry, how common the word is, its part of speech, the sentence translated, and example sentences from other videos in your own library.
From there:
- ⏎ sends the card straight to Anki.
- ⇧Q or the pencil opens the editor first, if you want to fix a field.
- The 1–5 keys set the word’s status without making a card, for when you realise you already know it.
- Drag across several words to mine a whole expression instead of one word.
The card arrives in Anki with the audio of that sentence cut out by ffmpeg, a frame from the video, the sentence, the translation, and the word’s lemma and part of speech.
If Anki is closed, nothing is lost. Cards queue up locally and send themselves the next time the app sees Anki running.
What lands in Anki

The front has the sentence, an animated clip of the moment (not a still) and the audio of that line. The back adds the word and sentence in your language, the episode and timestamp it came from, and how common the word is.
5. Reading books and articles
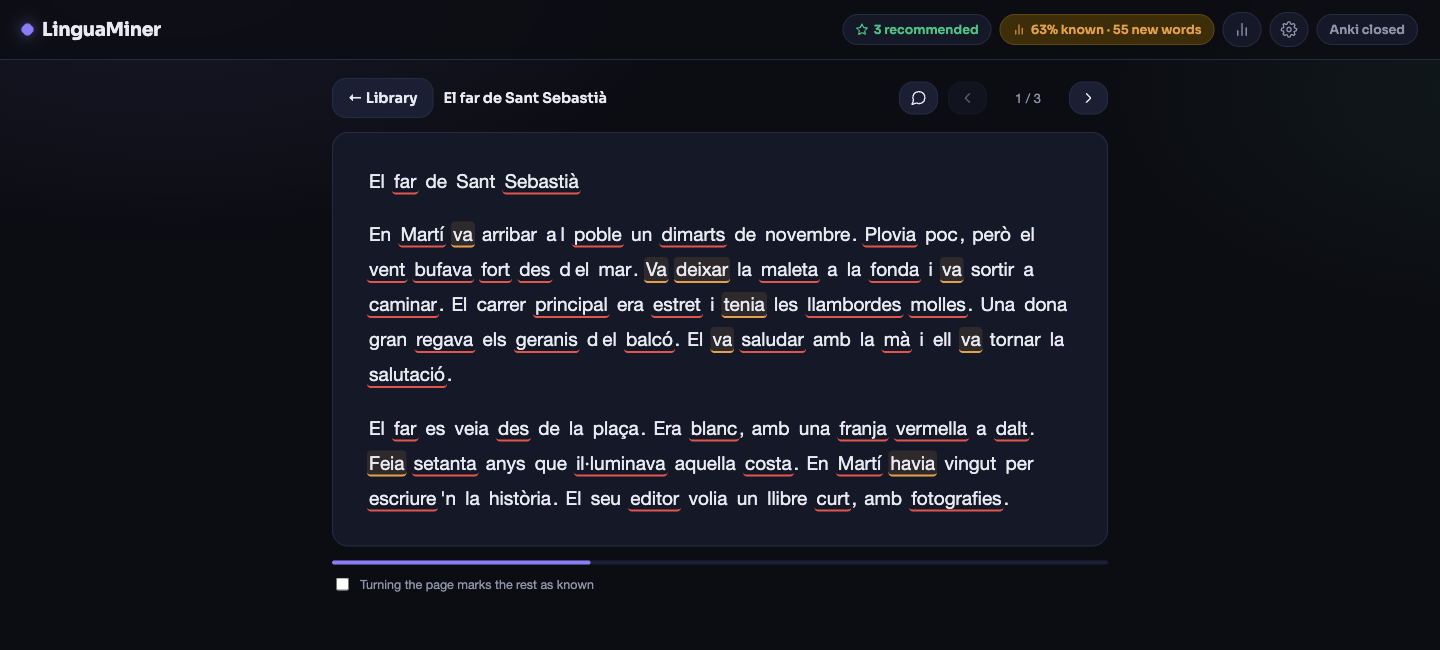
Everything above works on text too. Open a book on the front page takes a
.txt or an .epub and turns it into a session like any other — the same
colours from section 3, the same popup from section 4, the same cards into
Anki.
An EPUB is read in spine order, so chapters come out in the order the book intends rather than the order the file happens to store them. Scripts, styles and markup are stripped; you get the prose.
Text is split into sentences and laid out in pages, with paragraphs kept together so it reads like a book and not like a list of subtitles. The page you stopped on is remembered, so reopening a novel puts you back where you were.
Cards from a book
Identical to section 4, with two differences: there is no video frame, and the audio of the sentence is spoken by the Piper neural voice instead of being cut out of a soundtrack. The card footer carries the book title and the sentence number instead of a timestamp.
Sentence mode
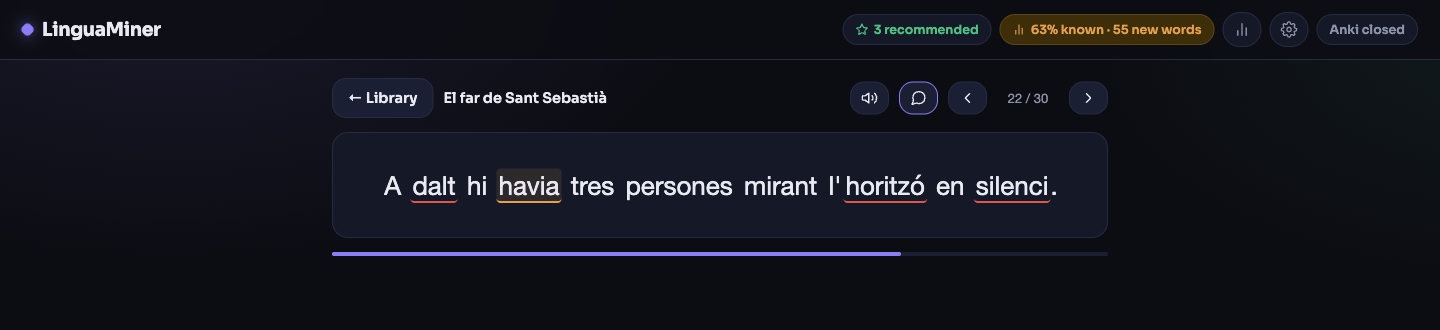
The speech-bubble button puts one sentence in front of you at a time, and the
speaker button next to it reads it aloud. Useful when a paragraph is dense and
you want to slow down. S (or ↓) replays it.
Turning the page
The switch under the page — Turning the page marks the rest as known — is the mechanic LingQ is built on: once you’ve read a page, whatever you didn’t click is presumably something you understood, so it goes to known and the next page shows you only what’s genuinely new.
It’s off by default, and when it’s on it behaves differently from LingQ’s in three ways that matter:
- It tells you how many words it changed, every time.
- The notice has an Undo button.
- It never touches a status you set yourself. A word you marked learning stays learning.
LingQ does this silently, which is why its users end up not trusting their own known-word count. If you’d rather keep marking by hand, leave the switch off and nothing happens.
Keys
The same map as the player: A/← and D/→ turn the page, 1–5 set the
word’s status, Q mines the word under the cursor, S reads the sentence.
What it doesn’t take
.pdf, .docx and .mobi aren’t supported. For a PDF, export or copy the
text into a .txt first.
6. Jumping around with the transcript
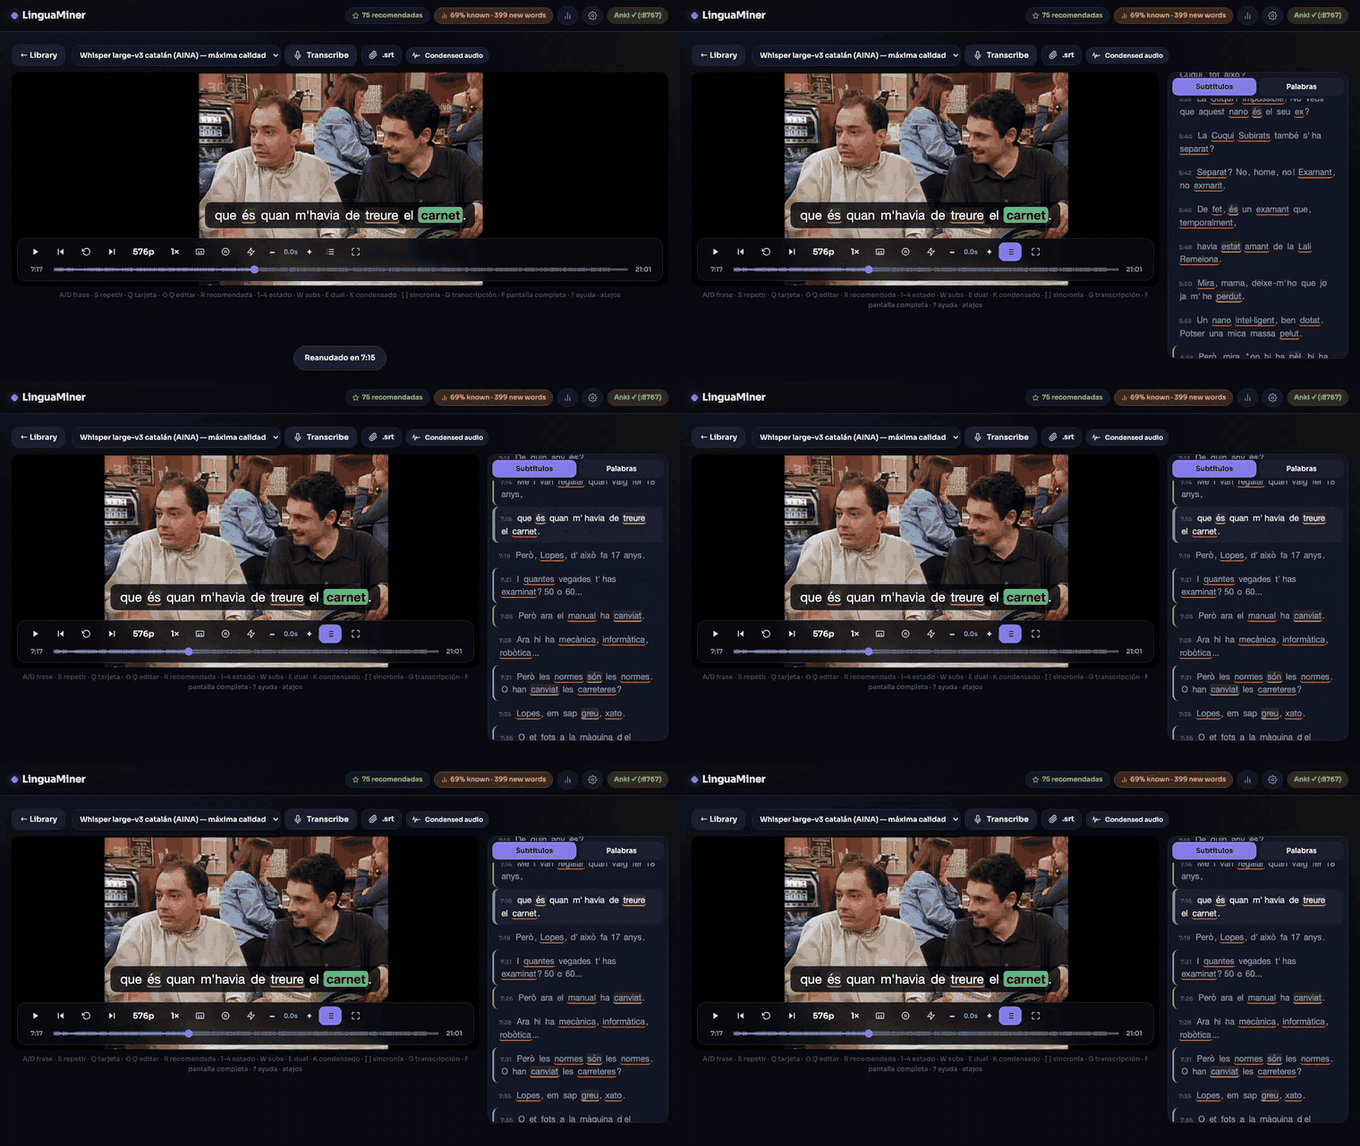
Press G for the full transcript in a side panel. Click any line to jump straight there. Lines with a recommended word are marked, so you can scroll and pick the worthwhile ones instead of watching linearly.
R jumps to the next recommended sentence directly, which is the fastest way to mine an episode you’ve already watched.
Other movement: A and D step back and forward one sentence, S replays the current one, P auto-pauses at the end of each line.
7. The words panel and your level
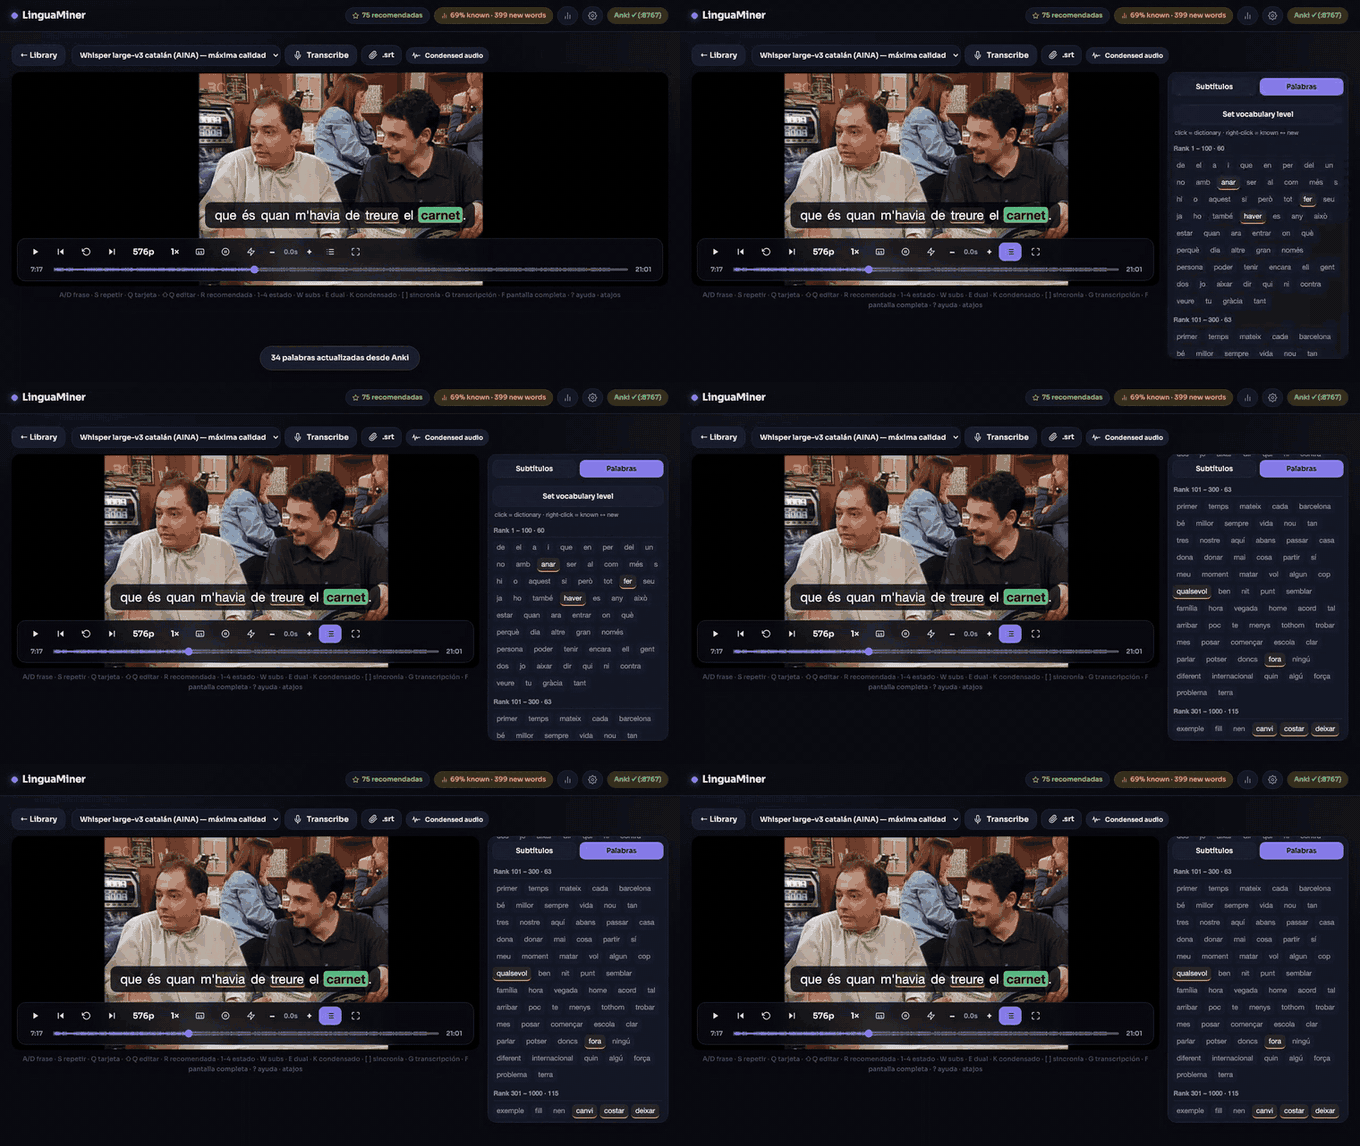
The Words tab lists every word in the video, grouped by how common it is in the language — rank 1–100, 101–300, and so on.
Left-click a word for its dictionary entry. Right-click flips it between known and new.
Set vocabulary level is the big one for a new user. It marks the N most frequent words of the language as known in one go, so the app stops highlighting the, and and because on day one. Pick the band that matches roughly where you are and adjust later.
8. Condensed audio
Condensed audio exports an MP3 containing only the dialogue of an episode, with the silence and the music cut out. A 50-minute show usually lands around 20 minutes.
It’s for passive listening — headphones on the way to work, second pass through material you’ve already mined. You need a transcript first, since that’s what tells the app where the speech is.
There’s also a K toggle in the player that does the same thing live: it skips the gaps between lines while you watch.
9. Bringing in words you already know
If you already study this language in Anki, don’t start from zero. Go to ⚙️ → Vocabulary you already know, pick one of your decks, and the app marks those words as known.
It reads the first field of each note, strips the HTML and audio tags, and skips anything that looks like a sentence rather than a word. It never overwrites a status you set yourself — it only fills in blanks.
After that, word states also keep syncing from your Anki review intervals, so a word you’ve matured stops being highlighted in the video without you doing anything.
10. Settings worth knowing
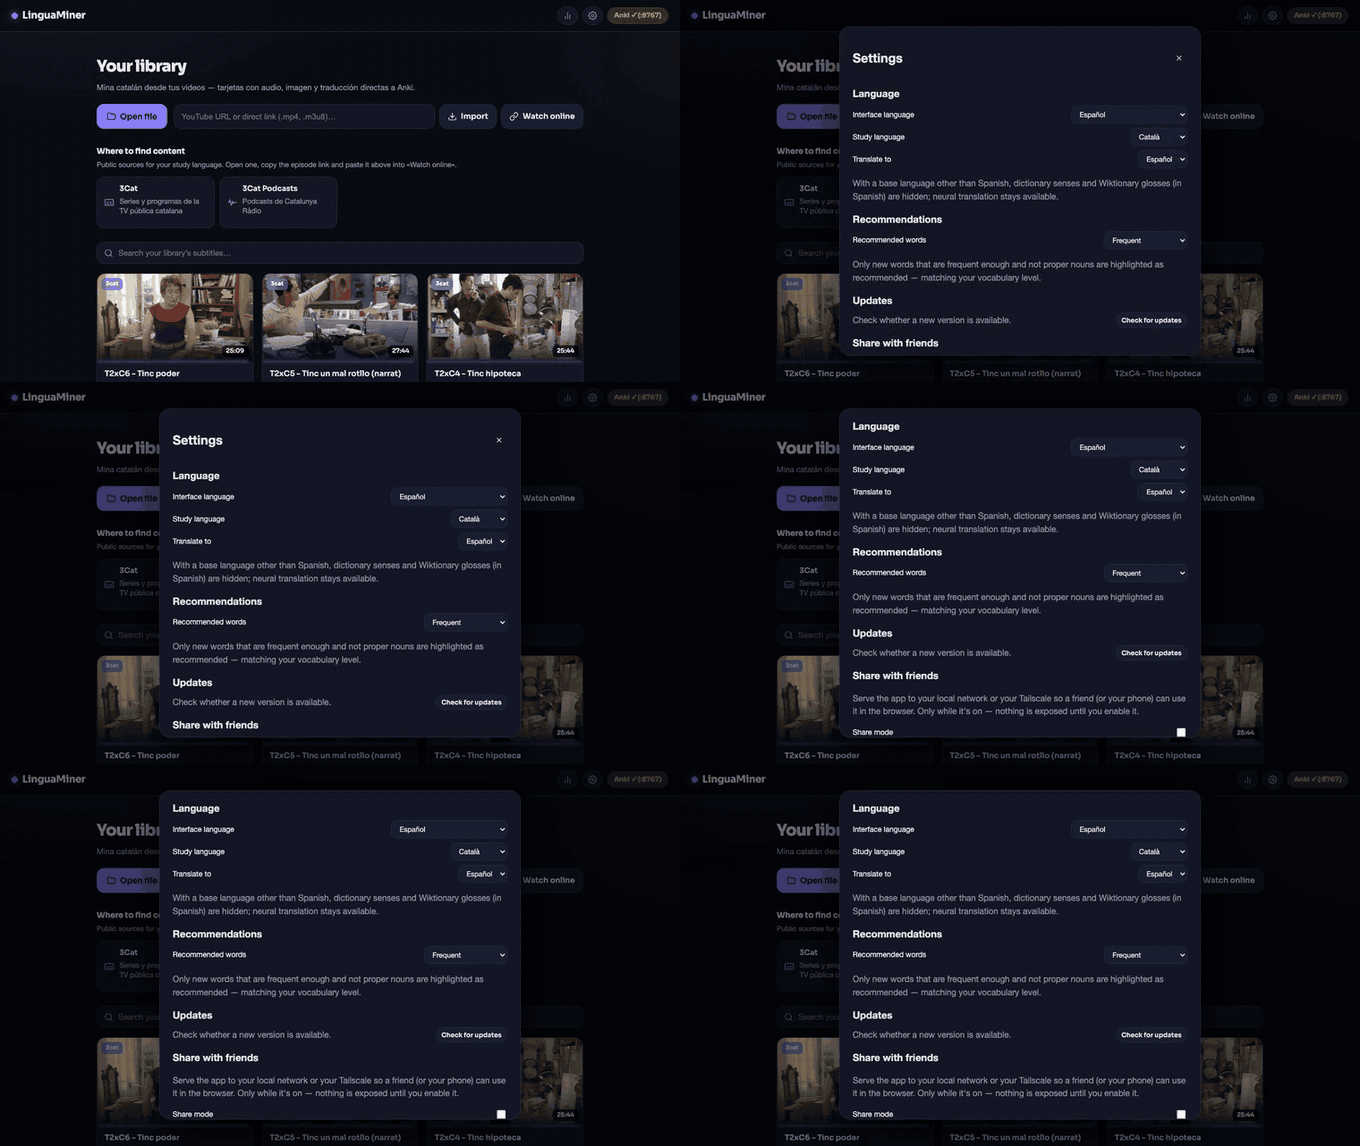
Interface language follows your system by default. English, Spanish and Catalan are available.
Study language is what you’re learning. Each one downloads its own translator, dictionary and voice the first time you pick it. If yours is missing, see adding a language.
Translate to is the language on the back of your cards. English or Spanish, depending on what the study language supports. Russian is English-only, because no Russian→Spanish model exists.
Recommended words is the frequency threshold from section 3.
Share mode serves the app to your local network or your Tailscale, so your phone or a friend can use it in a browser. It’s off by default and gives whoever connects full access, so only turn it on for people you trust.
Updates pulls the latest version without touching a terminal.
11. Keyboard shortcuts
Migaku’s layout, all remappable in ⚙️.
| Key | Does |
|---|---|
A / ← |
previous sentence |
D / → |
next sentence |
S / ↓ |
replay this sentence |
Q |
mine the word under the cursor |
⇧Q |
open the card editor |
1–5 |
set word status |
R |
jump to the next recommended sentence |
W |
hide subtitles |
E |
dual subtitles |
K |
condensed playback |
G |
transcript panel |
P |
auto-pause each line |
F |
fullscreen |
space |
play / pause |
[ ] |
nudge subtitle timing |
⏎ |
send the card |
Esc |
close whatever’s open |
? |
this list, in the app |
In the reader the same keys turn the page, set word states, mine and read the sentence aloud. The ones that need a video — pause, subtitles, condensed playback, fullscreen — simply do nothing there.
Something unclear, or the app does something this page doesn’t explain? Open an issue — gaps in this guide are bugs too.